Use this workflow to connect the LytxOne Gateway (LX1-G) to your vehicle using the OBD-II Y-Cable Install Kit (HCA-OBDY-01), for light duty vehicles (1996+ model year, OBD-II compliant) where the Gateway needs to share the diagnostic port with an existing device (ELD, scanner, etc.).
This cable has a Molex connector on one end for the Gateway, splitting into two OBD-II connectors, one for the vehicle's diagnostic port, and one spare for the existing device.
What You Will Need
- LytxOne Gateway
- OBD-II Y-Cable Install Kit (HCA-OBDY-01)
- Mounting bracket (matched to vehicle type)
HCA-OBDY-01 Cable Components
| Component |
Description |
| Molex connector |
Connects to the PWR/OBD port on the LytxOne Gateway |
| Vehicle-side OBD-II connector |
Plugs into the vehicle's OBD-II diagnostic port |
| Spare OBD-II connector |
Connects to the existing device sharing the port; mates with a mounting bracket for remounting |
Note
This cable must be a full pin pass-through type. CAN-H (pin 6), CAN-L (pin 14), ground (pins 4 and 5), and +12V (pin 16) must all be connected to both OBD-II connectors. Do not use power-only splitters.
Note
In certain cases, regulations in the State of California may prohibit
installing a Y-splitter cable if it involves relocating the vehicle's
in-vehicle diagnostic connector. It's the installer's responsibility
to confirm compliance with applicable local laws before proceeding.
Connect the Cable
-
Depending on vehicle type, the spare diagnostic port on the Y-cable must be mated with a compatible mounting bracket. Refer to the following chart to confirm the correct bracket for your vehicle make:
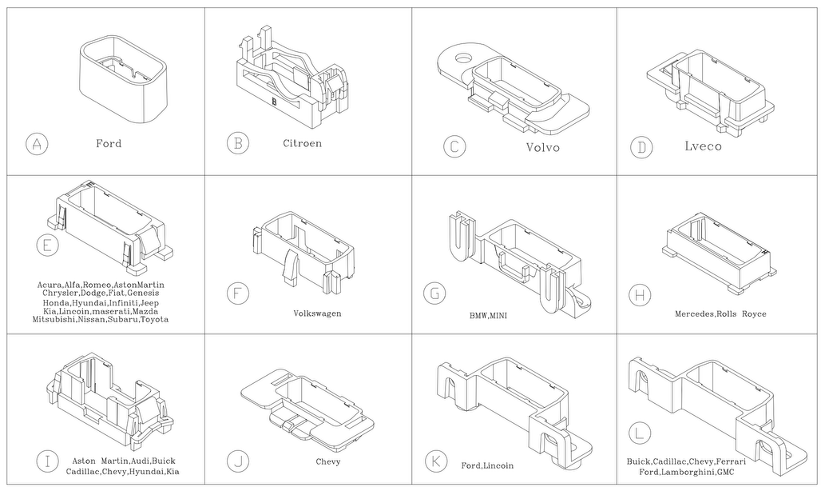
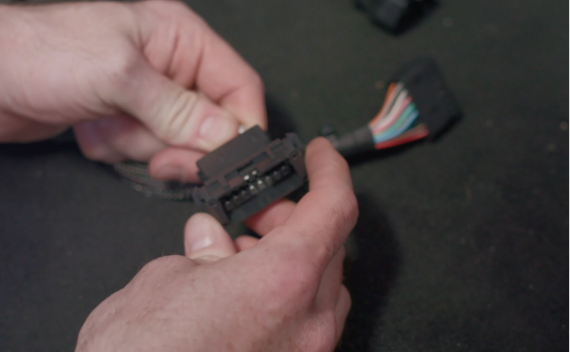
- Attach the mounting bracket to the spare OBD-II connector. Refer to the bracket compatibility chart above to confirm the corresponding bracket for your vehicle type.
-
The bracket will be used to secure the spare port back to the vehicle after the cable is connected.
-
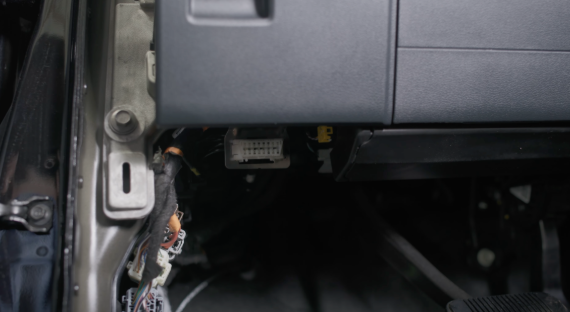
With the engine off, locate the vehicle's OBD-II diagnostic port, typically on or near the driver's side kick panel, below the steering column. Detach the port from its original mounting location, you may need to remove a plastic cover or unscrew a bracket to free the connector.
Note
If you can't locate the port, consult the vehicle's owner's manual or search online for the specific year, make, and model's OBD-II port location.
-
Connect the cable's vehicle-side OBD-II connector to the detached diagnostic port. The connector is keyed, the wider side of the trapezoidal shape faces up. Push firmly until fully seated.
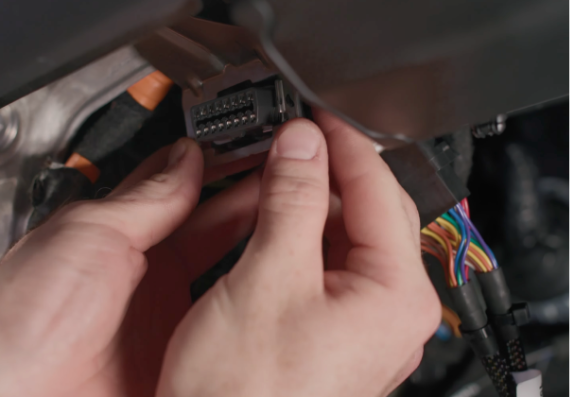
- Fasten the spare OBD-II connector back to the original port location, using the mounting bracket from step 2.
- If an existing device was connected to the port, reconnect it to the spare OBD-II connector.
- Connect the other end of the standard OBD-II cable to the PWR/OBD port on the LytxOne Gateway.
To finish the installation, continue to Step 3: Mount & Wire to secure the Gateway and mount the Camera, then Step 4: Activate, Verify, Complete to activate and verify the installation.
Safety Notice
Before installing or operating this device, read the full Safety and Maintenance Guidelines.