Use this workflow to connect the LytxOne Gateway (LX1-G) to your vehicle using the Hardwire 2-Wire Kit (HCA-HRW1-01). This installation method provides constant 12V power to the Gateway, so the device stays powered even when the ignition is off.
What You Will Need
- LytxOne Gateway
- Hardwire 2-Wire Kit (HCA-HRW1-01)
- Multimeter (recommended, not included)
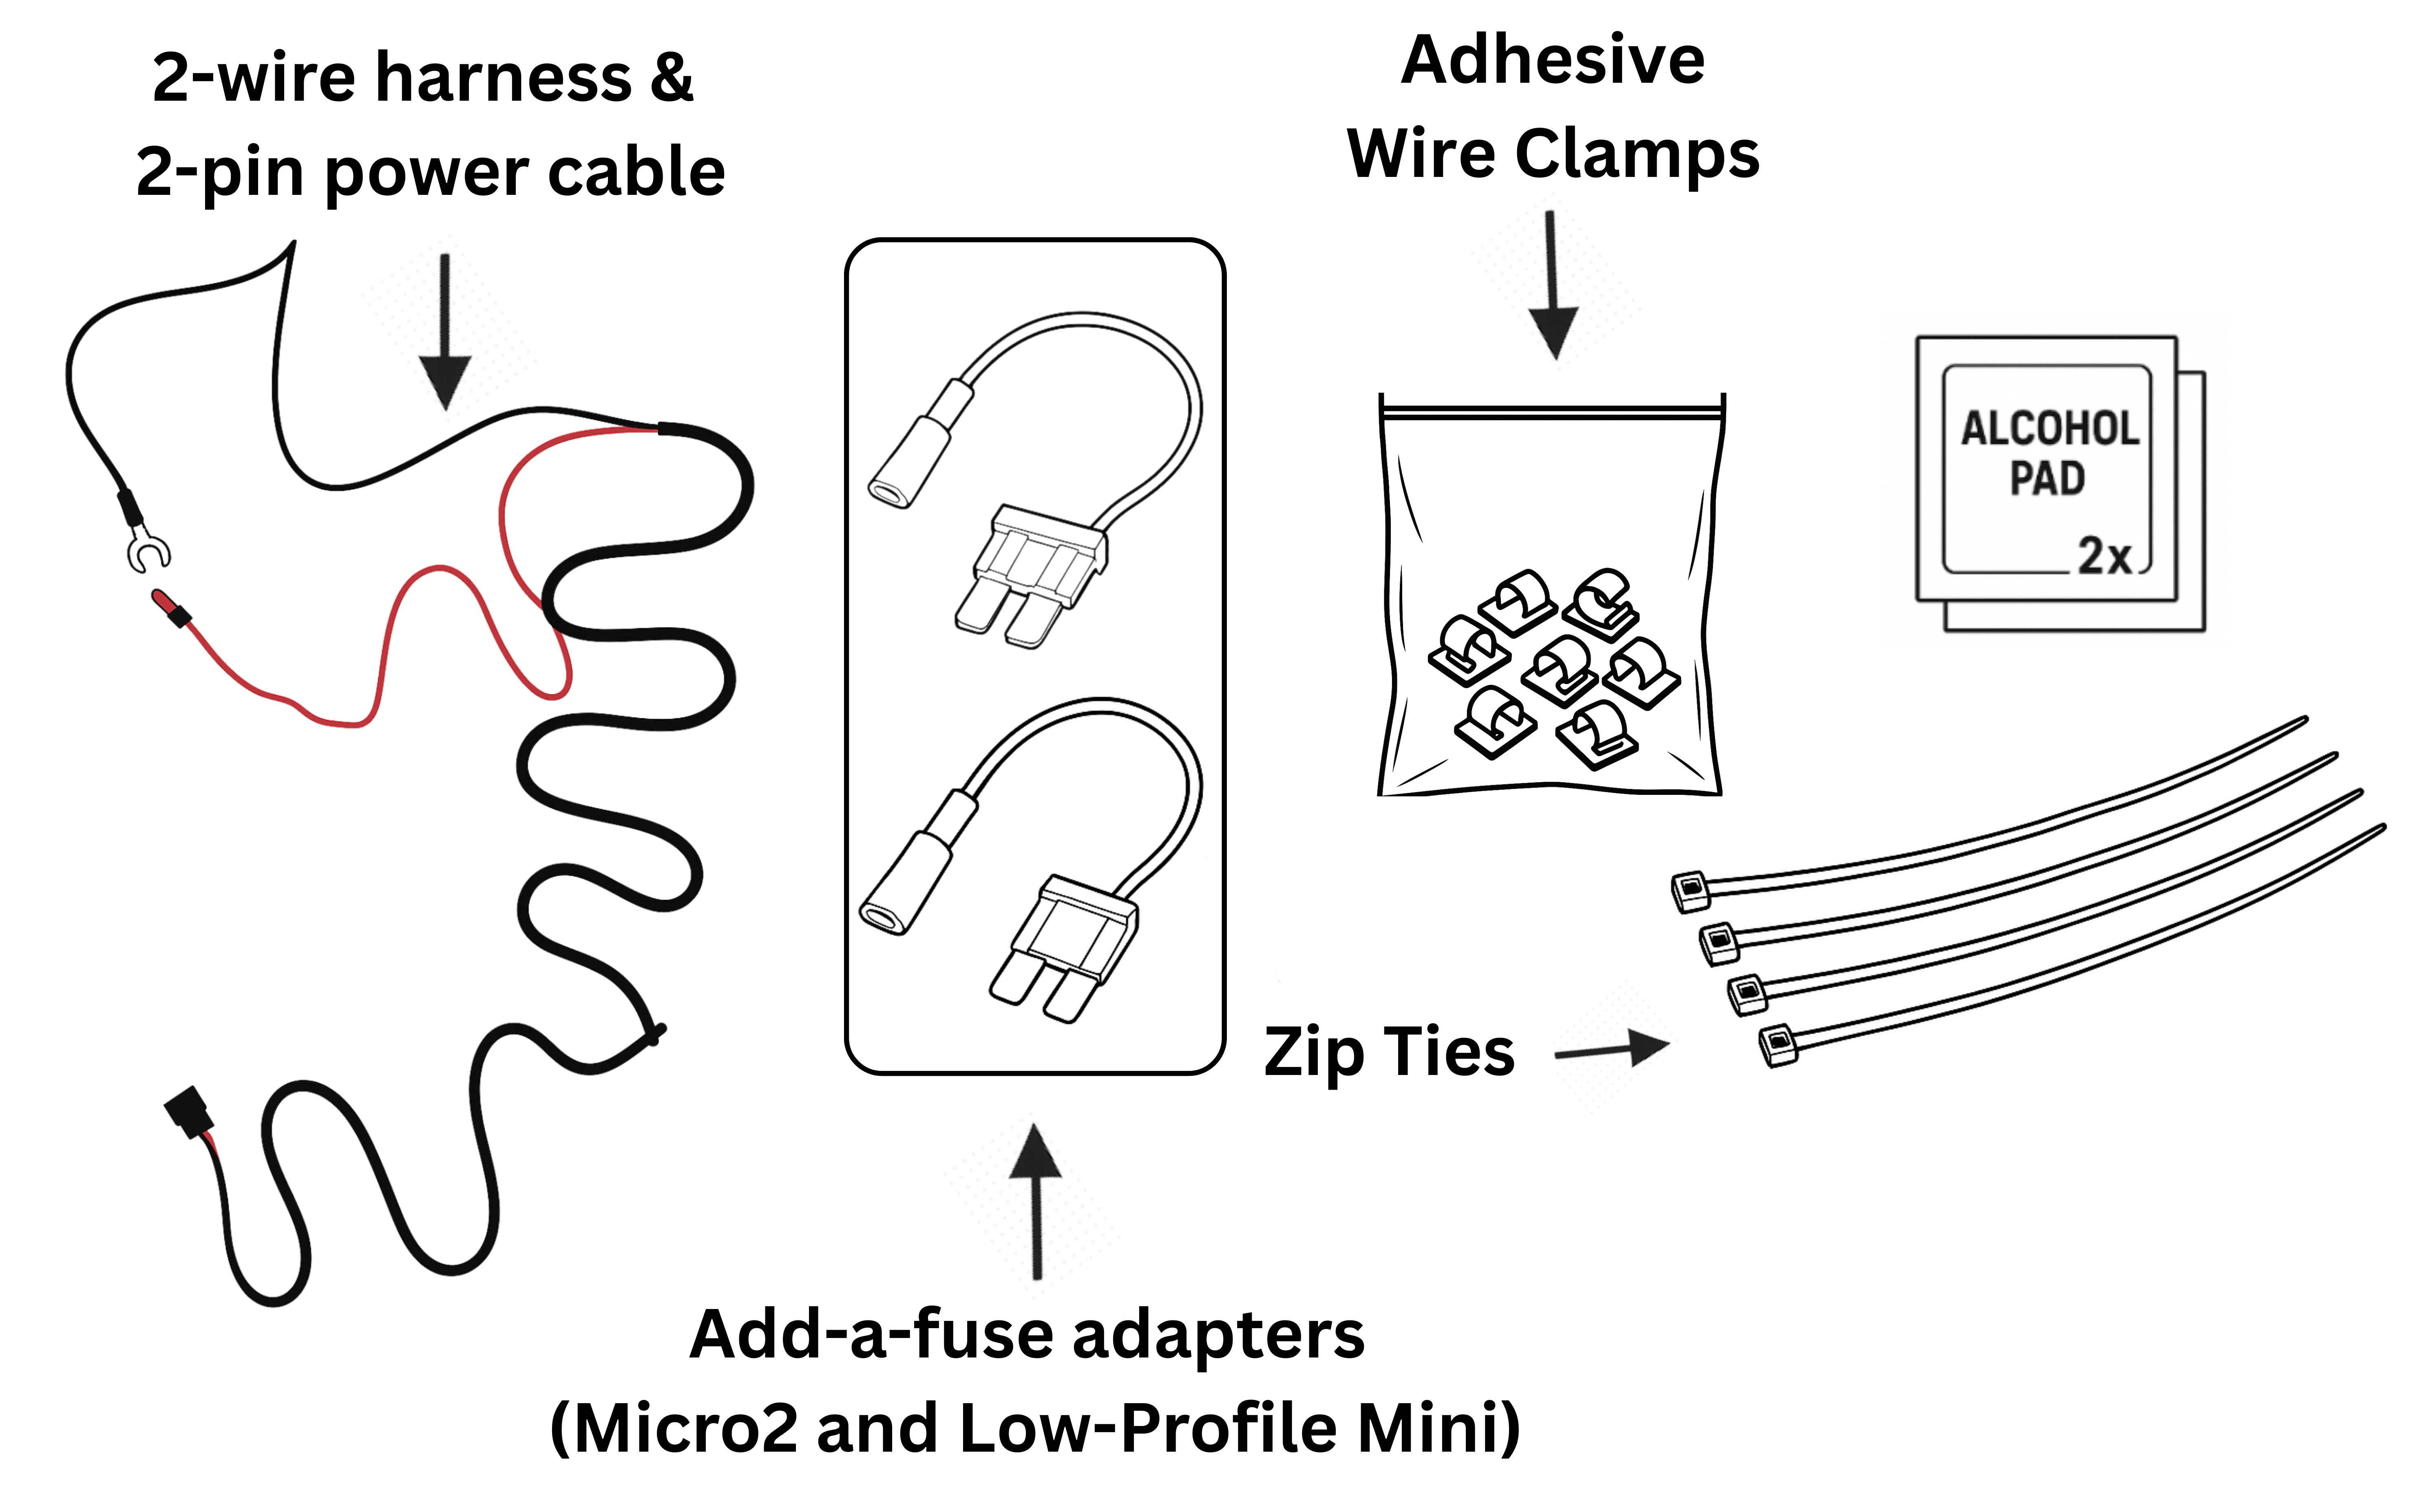
HCA-HRW1-01 Cable Components
| Component |
Description |
| 2-wire harness |
Red = power, black = ground |
| Add-a-fuse adapters |
Micro2 and Low-Profile Mini fuse adapters included, use whichever matches your vehicle's fuse type |
| Molex connector |
Connects to the PWR/OBD port on the LytxOne Gateway |
Connect the Cable
-
With the engine off, locate the vehicle's main fuse panel, typically under the driver's side dashboard.
- Identify a fuse slot that provides constant 12V power and stays live even when the vehicle is off. Common slots that usually provide constant power include the dome light, hazard lights, and seat adjustment circuits. Use a multimeter to confirm before proceeding.
- Remove the selected fuse. Insert the original vehicle fuse into the lower slot of the add-a-fuse adapter, so the original circuit stays protected. Insert the supplied fuse into the upper slot, this protects the Gateway.
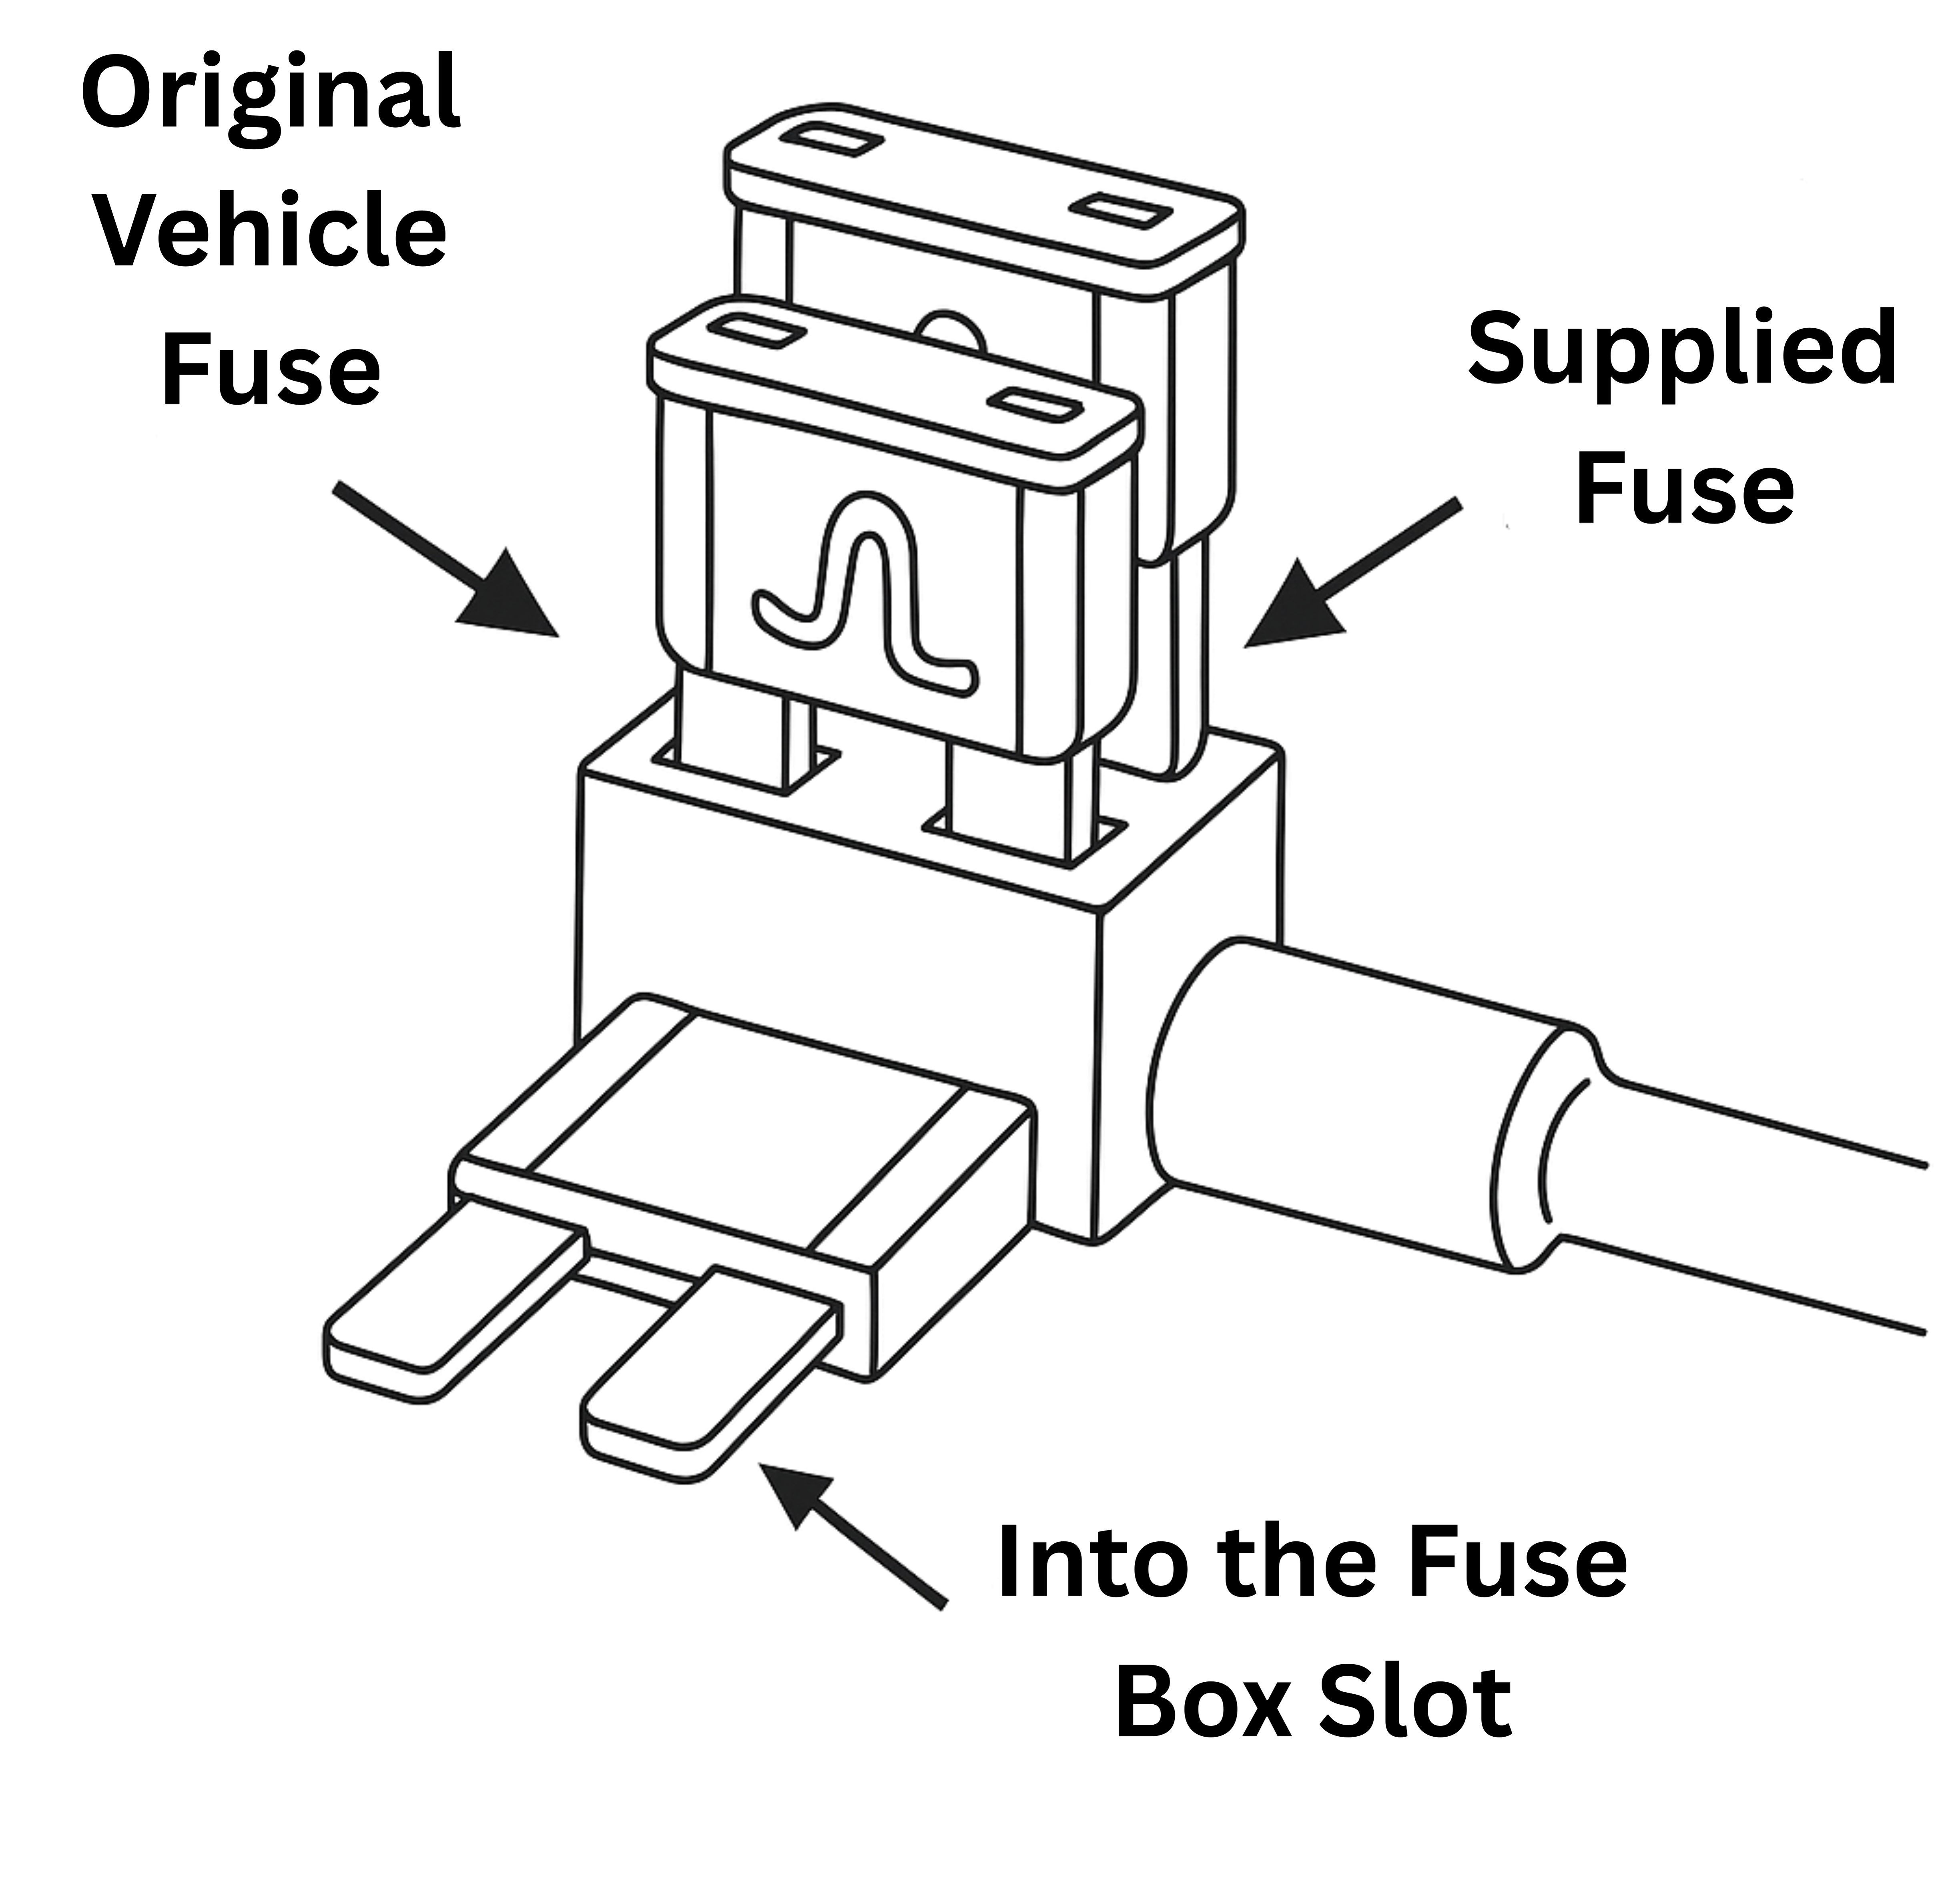
- Plug the add-a-fuse securely into the fuse box slot, fully seated.
- Connect the red (power) wire from the 2-wire harness to the pigtail lead of the add-a-fuse using the included crimp connector.
- Locate a clean, unpainted metal bolt or chassis ground point near the fuse panel. Lightly sand or scrape the contact point to remove paint or corrosion, then secure the black (ground) wire to it. Tighten firmly so the connection can't loosen from vibration.
- Confirm the cable is clear of the vehicle's pedals, steering linkage, and other moving parts. Physically operate all pedals through their full range of motion to check.
- Connect the Molex connector to the PWR/OBD port on the LytxOne Gateway.
- Route wires neatly along existing harnesses. Use zip ties and adhesive wire clamps to keep cables away from moving parts, sharp edges, and hot components. Coil and secure any excess cable out of sight.
Note
If the Gateway doesn't power on, confirm the add-a-fuse is seated
correctly, verify the ground connection is secure, and re-check fuse
orientation and power source with a multimeter.
To finish the installation, continue to Step 3: Mount & Wire to mount the Camera, then Step 4: Activate, Verify, Complete to activate and verify the installation.
Safety Notice
Before installing or operating this device, read the full Safety and Maintenance Guidelines.